




How to connect a Glove Box Scroll Vacuum Pump to a glove box?
 Sep 24, 2026|
 If you've ever worked with a glove box-whether in a research lab, battery manufacturing facility, pharmaceutical production line, or semiconductor testing space-you know how critical consistent, reliable vacuum management is. Glove boxes are designed to create and maintain controlled atmospheres: often inert, oxygen-free, or moisture-free environments that protect sensitive materials, prevent contamination, or support chemical reactions that degrade in open air. A glove box scroll vacuum pump is the workhorse that makes this possible, pulling out unwanted gases, setting the initial low-pressure conditions, and maintaining the purity of the enclosed space over time. As a supplier of specialty vacuum solutions, I've helped dozens of teams work through the process of connecting these pumps, and the good news is: when done right, it's straightforward, low-maintenance, and far less intimidating than it sounds. This post will walk you through every step, from pre-installation checks to post-connection testing, so you can get your glove box up and running efficiently without unnecessary downtime.

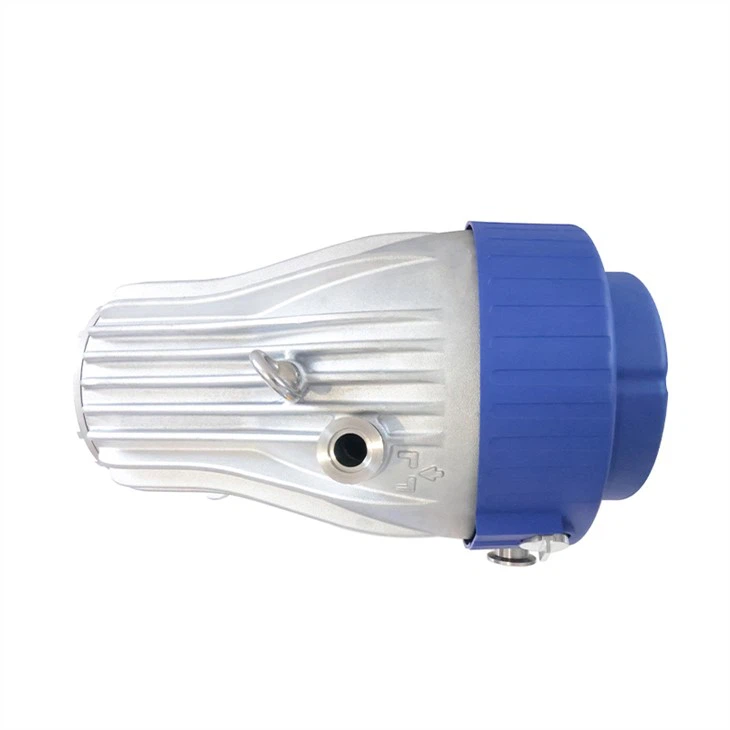
First, let's clarify why a scroll pump is the right choice for this application. Unlike traditional oil-sealed pumps that can release harmful vapors or require frequent oil changes, scroll pumps are oil-free, quiet, and produce minimal vibration-all essential for keeping your glove box atmosphere clean. Our line of Glove Box Scroll Vacuum Pumps is specifically engineered for this exact task, with precise vacuum control and durable components that stand up to continuous use. If you're still evaluating your options, you might also check out related models like the Hand Dry Vacuum Pump for compact, high-purity tasks, the Air Suction Portable Scroll Vacuum Pump for sites where mobility matters, the Oil Evacuation Vacuum Pump for specialized liquid removal needs, or the Air Vacuum Pump For Bagging for auxiliary vacuum tasks. But for connecting directly to your glove box, we'll focus on the steps tailored to our purpose-built pump.
Before you touch any hardware, pause to do your pre-connection prep. Skipping this step is a common mistake that leads to leaks, poor vacuum performance, or even pump damage down the line. First, confirm that both your glove box and your Glove Box Scroll Vacuum Pump are powered off and unplugged-this is non-negotiable for safety, especially if you're working in a space with sensitive materials or flammable gases. Next, gather your tools and parts: you'll need the pump that's rated for your glove box's volume (a pump that's too small will take forever to pull vacuum, while one that's too large can cause pressure spikes that damage your glove box seals), a compatible vacuum hose (we recommend a heavy-duty, oil-resistant, corrugated hose that won't collapse under vacuum), two hose clamps sized to fit your hose and pump ports, a pipe thread sealant that's compatible with inert gases (avoid Teflon tape in most cases, as it can shed particles that contaminate your glove box), and a pressure gauge or vacuum tester to check for leaks later.
Another key pre-check: verify that your glove box has the correct port for vacuum connection. Most modern glove boxes come with a standard 1/2-inch or 3/4-inch male NPT (National Pipe Thread) vacuum port, but older or custom-built units may have different sizes. If your port is not compatible with your pump's inlet, you can purchase a simple adapter from a vacuum parts supplier-just make sure it's rated for the vacuum level you'll be working with (our Glove Box Scroll Vacuum Pump typically operates between 1 and 100 mTorr, so adapters rated for at least 1 Torr are sufficient). It's also a good idea to inspect your glove box port for cracks, rust, or debris-any damage here will cause leaks, so wipe it clean with a lint-free cloth and use a small emery cloth to smooth any rough edges before you begin.
Now, let's get to the actual connection process. Start with the pump: find its main vacuum inlet port and located on the side or top of the pump housing. Take one end of your vacuum hose and slide it over this inlet port. Secure it tightly with a hose clamp-use a screwdriver to tighten the clamp until the hose won't move or twist; a loose connection here is the number one cause of vacuum loss. Next, take the other end of the hose and align it with your glove box's vacuum port. Before sliding it on, apply a small amount of pipe thread sealant to the outer threads of the glove box port (be careful not to get sealant inside the port, as it can be pulled into the pump and cause damage). Slide the hose over the port, and tighten the second hose clamp securely. If you're using an adapter, attach the adapter to the glove box port first, then attach the hose to the adapter, following the same clamping steps.
Once the hose is connected, it's time to add a critical safety and performance component: a vacuum isolation valve. Wait, I know I didn't mention that in your prep list, but it's a must-have accessory for any glove box pump setup. The valve is installed between the glove box port and the pump, and it lets you disconnect or shut off the pump without breaking the vacuum in the glove box. This is especially useful if you need to perform maintenance on the pump, change filters, or adjust settings without having to re-purge the entire glove box (which can take hours and waste inert gas). To install the valve, simply break the connection between the hose and either the glove box or the pump, screw the valve into the gap, and use Teflon pipe thread sealant on the valve's threads to ensure a tight seal. Most isolation valves for this application are quarter-turn ball valves, which are easy to open and close quickly.
Now that the physical connections are done, you need to check for leaks. Even a tiny leak-less than 1 mTorr per minute-can ruin your glove box's controlled atmosphere, so this step is non-negotiable. Start by making sure all clamps are tight and the isolation valve is fully open. Plug in your Glove Box Scroll Vacuum Pump, turn it on, and let it run for 5 to 10 minutes. Watch the vacuum gauge on your glove box (or the external gauge you attached) as it pulls down: it should steadily drop to your desired operating level-for most glove box applications, that's between 10 and 100 mTorr. If the vacuum level stops dropping or starts rising after reaching a certain point, you have a leak. To find it, use a vacuum leak detector or simply apply a small amount of soapy water to all your connections; if bubbles form, that's your leak point. Tighten the clamp or reapply sealant, then test again. Don't forget to check the pump's exhaust port too-some leaks come from the pump's outlet if the exhaust filter is loose or damaged.
Once the vacuum is stable and at your desired level, do a final test to make sure everything is working as it should. Close the isolation valve and turn off the pump. Wait 15 minutes, then check the vacuum gauge on the glove box. If the pressure hasn't risen more than 5 mTorr, your seals and connections are tight. If it has, you missed a leak-go back and double-check all clamps and joints. This test is important because it simulates what will happen when you're running experiments inside the glove box, where you don't want atmospheric gases seeping in.
After the initial connection and testing, there are a few maintenance tips to keep your Glove Box Scroll Vacuum Pump running smoothly. Since it's an oil-free pump, you won't need to change oil, but you will need to replace the inlet and exhaust filters every 6 to 12 months (depending on use) to prevent dust and debris from entering the pump. Our filters are designed specifically for our scroll pumps, so you can find them easily on our website. Also, make sure the pump is placed on a flat, stable surface away from heat sources and direct sunlight-overheating can shorten the pump's lifespan. Finally, when you're not using the pump, close the isolation valve to keep dust out of the hose and ports.
At this point, you should have a fully functional connection between your glove box and your scroll pump, ready to maintain that critical controlled atmosphere. If you're in the market for a new Glove Box Scroll Vacuum Pump or need replacement parts, we offer custom sizing for glove boxes of all volumes, from small lab units to large industrial systems. We also provide technical support for every step of the installation process, so you don't have to navigate any issues alone. Whether you're upgrading an old setup or building a new glove box system from scratch, our team can help you find the right solution for your needs, including auxiliary pumps like the Hand Dry Vacuum Pump, Air Suction Portable Scroll Vacuum Pump, Oil Evacuation Vacuum Pump, and Air Vacuum Pump For Bagging.
When you're ready to move forward with purchasing or have questions about your specific application, our team is here to assist. You can reach out to discuss sizing, installation guidance, or any other details to ensure your glove box vacuum system operates reliably for years to come.
References:
- Vacuum Technology: Principles and Practice, 2nd Edition, J. F. O'Hanlon, Wiley, 2003.
- Glove Box Design and Operation Guide, American Vacuum Society, 2018.
- Scroll Pump Applications for Laboratory and Industrial Vacuum Systems, Edwards Vacuum Technical Bulletin, 2021.
- Compatibility Guide for Vacuum System Components, National Institute of Standards and Technology (NIST), 2020.